Hey friends! 🍂 As the leaves turn golden and the air gets a bit crisper, I’ve got the perfect fall activity to share with you and your little ones. This handprint fall tree craft for preschool ers and toddlers, is not just a fun way to celebrate the season; it’s also a beautiful keepsake that captures your child’s tiny hands and big creativity.
And the best part? It’s simple enough that even toddlers can join in on the fun!
We all know how magical this time of year can be, and what better way to bring that magic into our homes than with a simple, yet a meaningful fall tree-craft preschool project? Whether you’re looking for a cozy afternoon activity, something to add to your homeschool routine, or just a way to keep those little hands busy, this is a wonderful option that combines creativity, learning, and a whole lot of fall vibes.
And yes, this fall tree craft preschool idea is perfect for toddlers too—making it a great choice for siblings of different ages to enjoy together.
So grab some paint, paper, and let’s create something special together. This tree craft is one of those projects that you’ll want to keep around for years to come, not just because it’s adorable, but because it’s a memory of this special time spent with your little ones.
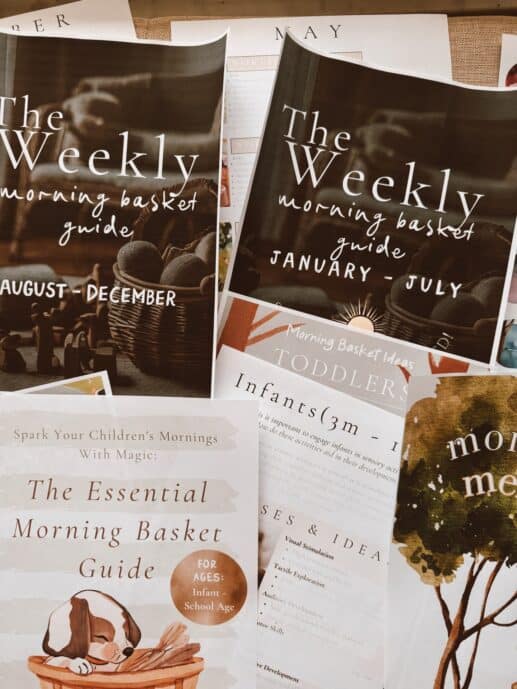
This activity for the autumn/fall season is just one of the many fun ideas included in my Morning Basket Weekly Planner from August to December, filled with holiday and seasonal themes! If you’re not familiar with a morning basket, transform your routine by gaining peace and screen-free activities with this comprehensive 101 Guide on Morning Baskets!

Let’s dive in and make some autumn magic with this charming craft, perfect for both preschoolers and toddlers alike!
1. Paint the Hand
- Choosing the Colors: Select paint colors that reflect the fall season—think warm hues like orange, yellow, brown, and red. You can use a single color for a more uniform look or mix multiple colors on the hand for a more variegated, leaf-like effect.
- Applying the Paint: Use a paintbrush to apply the paint evenly to your child’s hand. Make sure to cover the entire palm and fingers, but not too thickly, to avoid excess paint smudging when pressing onto the paper. Encourage your child to be patient and still during this part, as it can be ticklish!
2. Create the Handprint
- Positioning the Hand: Help your child carefully position their painted hand above the paper. It’s best to guide them in placing it down flat, pressing gently to ensure all parts of the hand (palm and fingers) make contact with the paper.
- Lifting the Hand: After pressing down, instruct your child to lift their hand straight up to avoid smudging the print. If there are any gaps or light spots, you can gently fill them in with a little extra paint or leave them for a more natural look.
- Alternative Techniques: For an extra artistic touch, consider using a sponge to apply the paint, which can create a more textured appearance. Alternatively, use glitter paint or add a dusting of fine glitter before the paint dries to add some sparkle.
3. Add Your Fall Tree Details
- Drawing the Trunk and Branches: Once the paint is completely dry (you may need to wait 10-15 minutes or speed up the drying process with a hairdryer), use a dark brown or black marker to draw the tree trunk. The base of the palm print becomes the trunk, and the fingers are the branches.
- Branch Details: Extend the branches by drawing additional smaller branches from each finger. You can make these as simple or intricate as you like, depending on your child’s age and interest. For younger kids, you might just add a few lines, while older children can enjoy adding more detail and texture.
- Leafy Touches: For a more realistic effect, you can dot the branches with additional small leaves or buds using a fine-tip marker or even more paint. This adds to the autumnal feel of the tree.
4. Optional Cutting
- Cutting Out the Handprint: If you want to use the handprint tree as part of a larger project (like a greeting card or collage), you can carefully cut out the handprint along the edges. This can be a task for older children or adults to avoid any mishaps with the scissors.
- Creative Uses: Once cut out, these handprint trees can be glued onto a different background, attached to popsicle sticks to make puppets, or combined with other elements like real leaves, acorns, or small twigs to create a 3D nature scene.
5. Display
- Showcasing the Artwork: These handprint trees make beautiful decorations. Consider displaying them on a corkboard, framing them, or even using them as part of a seasonal centerpiece on your dining table.
- Gift Ideas: These crafts can also be used as gifts for grandparents or friends. Add a personal message or date on the back or create a series of these handprints to mark different years and seasons as your child grows.
- Incorporating into a Learning Activity: Use this craft as an educational opportunity to talk about the seasons, how trees change during autumn, and the importance of nature. It’s a great way to blend creativity with learning!
This expanded guide should help you create a memorable and engaging crafting experience with your kids, while also producing beautiful autumn-themed artwork that you can cherish for years to come!